This example explains how to deploy a WordPress site and a MySQL database using Kubernetes.
Portworx solves two critical issues for running WordPress in containers:
- Running a high performance, HA MySQL database
- Using shared volumes for file uploads
By combining these two Portworx features with a Kubernetes cluster, the WordPress instance:
- automatically replicates the MySQL data for HA
- horizontally scales the WordPress PHP container using multi-writer semantics for the file-uploads directory
- automatically repairs itself in the event of a node failure
This example utilizes Kubernetes storage primitives PersistentVolumes (PV) and PersistentVolumeClaims (PVC).
The spec files provided in this example are based on beta deployment APIs and are specific to Kubernetes versions 1.8 and above. To adapt this example to an earlier version of Kubernetes, update the beta API appropriately or reference earlier versions of Kubernetes.
Create a Nirmata Environment
To begin, create an Environment in Nirmata.
Select Environment from the sidebar menu. Then click, +Add Environment and complete the information in the pop-up window. Click Add.
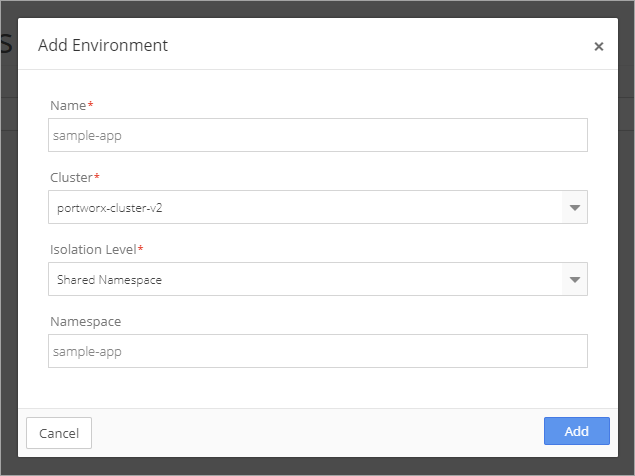
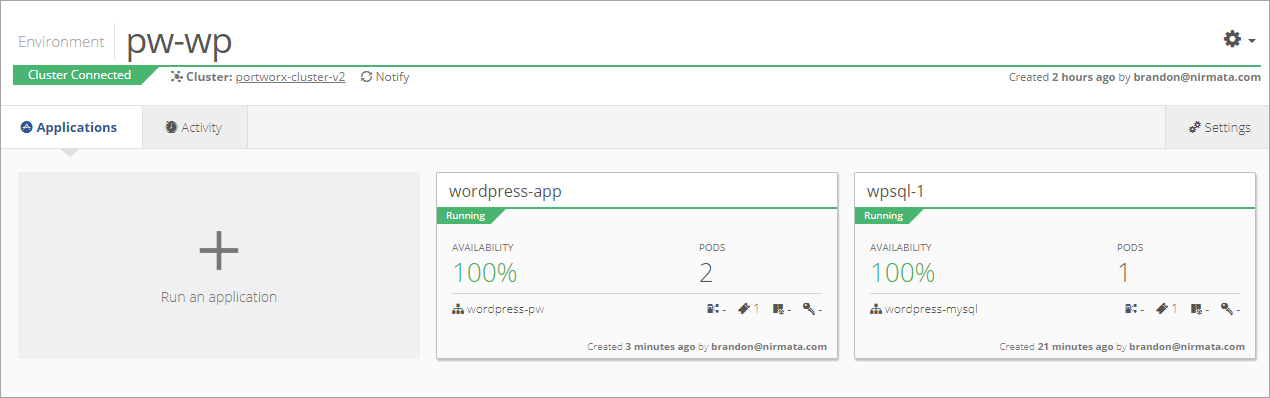
The new environment appears in the Environments list.
The MySQL/WordPress services will deploy in this Environment.
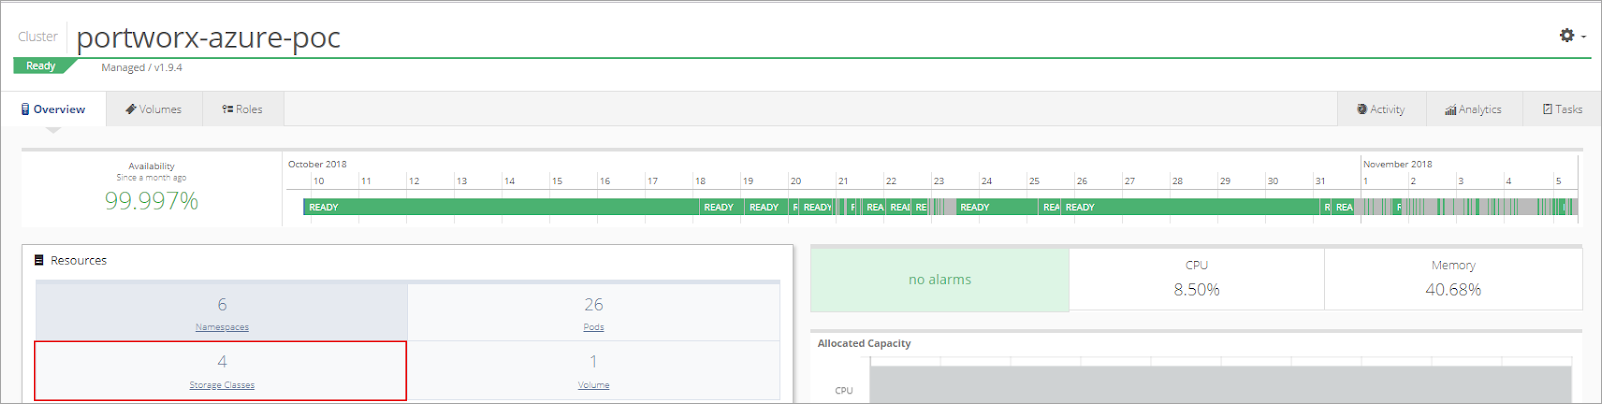
Create Storage Classes
Next, setup a storage class and replica pool based on the Environment.
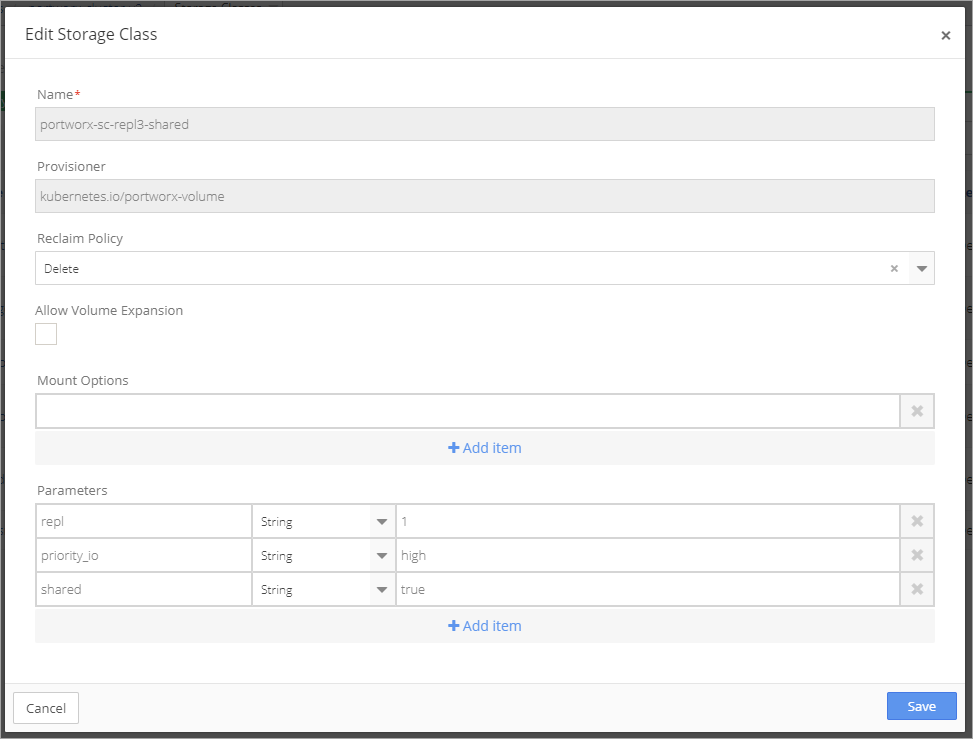
Open the cluster and select Storage Class from the Resources menu.
Select +Add Storage Class.
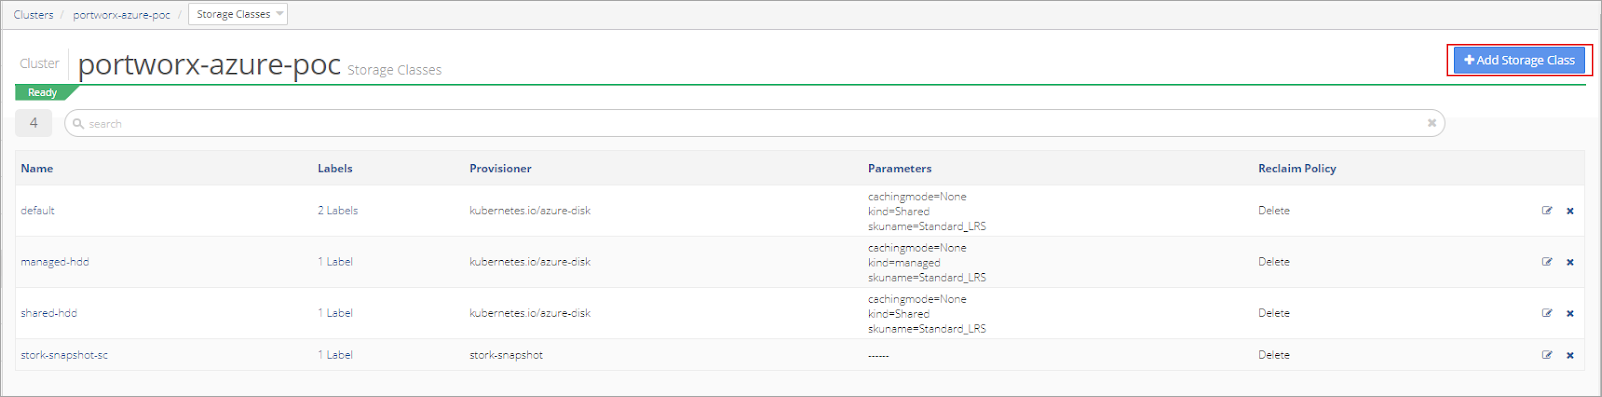
Set the repl level from one to three, based on the Environment. Name the Storage Class, select a Provisioner and set the Reclaim Policy to Delete.
Note that there is no volume mount.
Click Save.
Create a MySQL Application
To create a new MySQL Application, utilize the MySQL YAML template. Adjust the template as needed. Remember to replace �password� with a secure keyref.
MySQL YAML Template:
apiVersion: v1
kind: Service
metadata:
  name: wordpress-mysql
  labels:
    app: wordpress
spec:
  ports:
    - port: 3306
  selector:
    app: wordpress
    tier: mysql
  clusterIP: None
---
apiVersion: extensions/v1beta1
kind: Deployment
metadata:
  name: wordpress-mysql
  labels:
    app: wordpress
spec:
  strategy:
    type: Recreate
  template:
    metadata:
      labels:
        app: wordpress
        tier: mysql
    spec:
      # Use the stork scheduler to enable more efficient placement of the pods
      schedulerName: stork
      containers:
      - image: mysql:5.6
        imagePullPolicy:
        name: mysql
        env:
        - name: MYSQL_ROOT_PASSWORD
          value: password
        ports:
        - containerPort: 3306
          name: mysql
        volumeMounts:
        - name: mysql-persistent-storage
          mountPath: /var/lib/mysql
      volumes:
      - name: mysql-persistent-storage
        persistentVolumeClaim:
          claimName: mysql-pvc-1
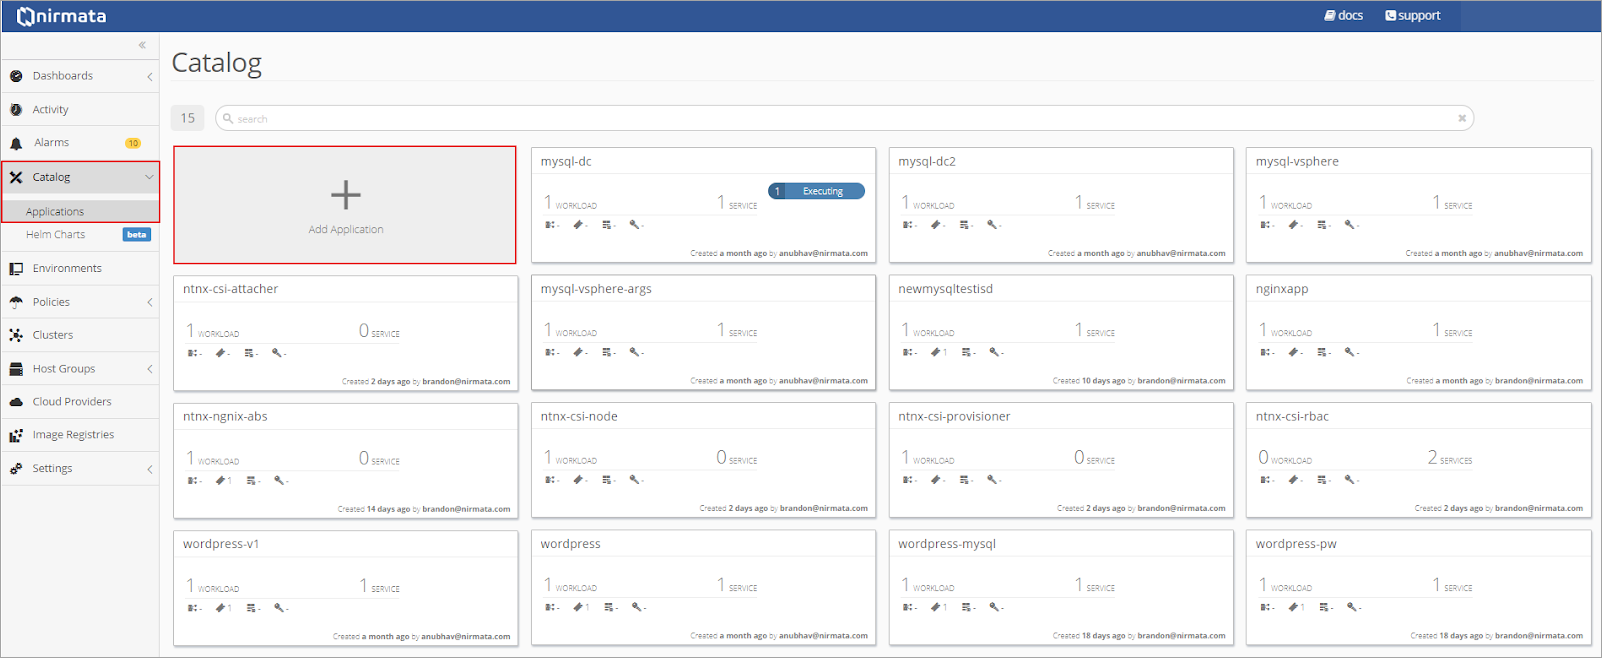
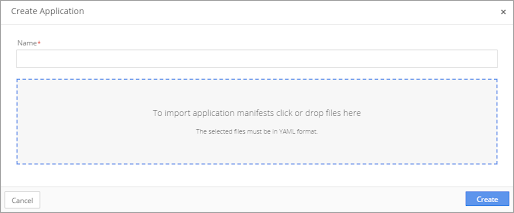
To add the MySQL YAML to the Application Catalog, click on Catalog in the sidebar menu and then select Application Catalog. From the main Application Catalog screen, click Add Application.

Drop the MySQL YAML file into the upload box or select the file from the directory.

Click Create. Once created, the MySQL application is listed in the Nirmata Application Catalog.
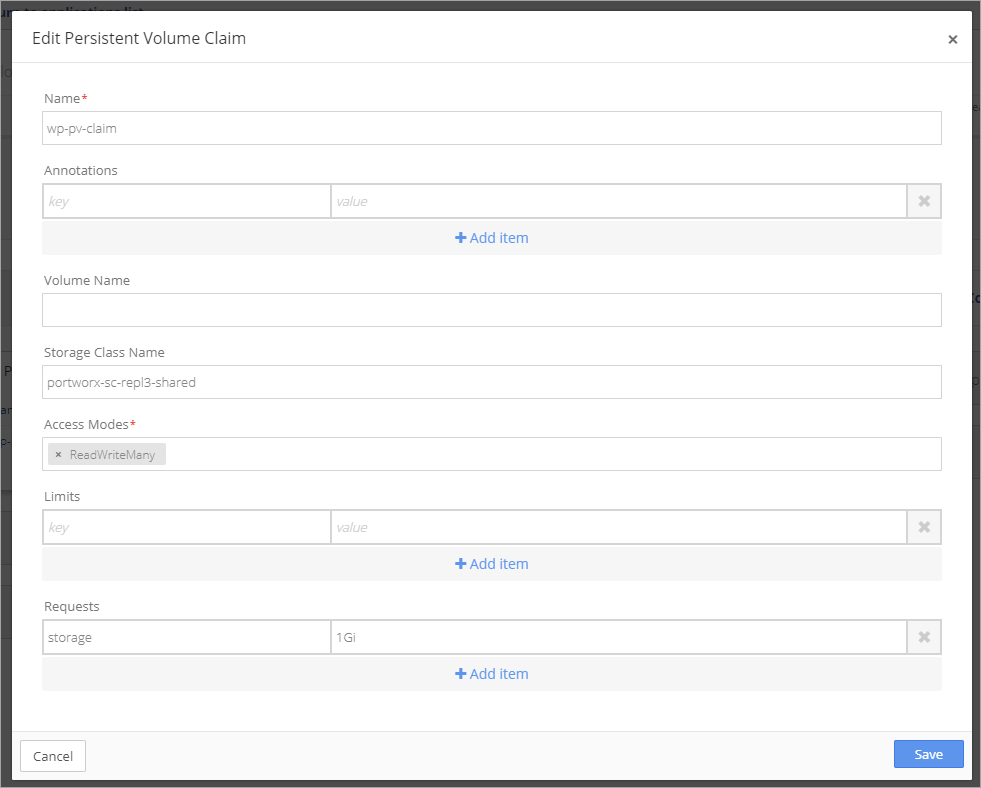
Add Persistent Volume Claims to the MySQL Application
Next, add the Persistent Volume Claims (PVC) to the MySQL Application.
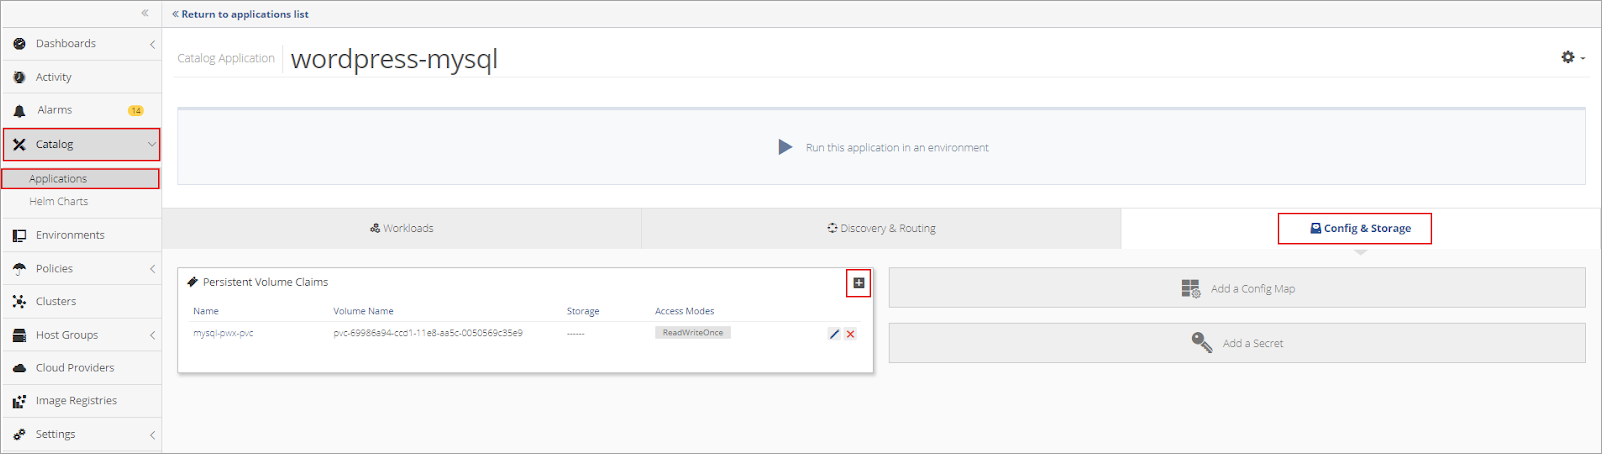
Open the newly created MySQL Application in Nirmata by selecting Catalog from the sidebar menu and then Applications.
Click on the MySQL application in the Application List. Then open the Config & Storage dashboard.
Click + in the Persistent Volume Claims window to add a new PVC.
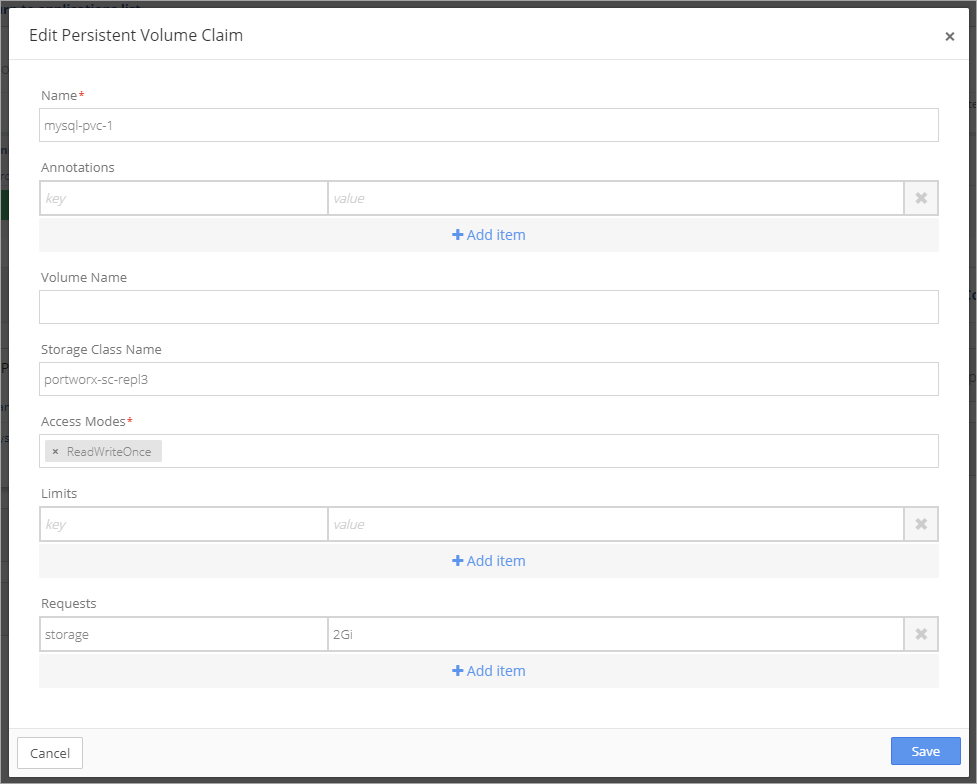
Complete the information in the Edit Persistent Volume Claim setup box.
Deploy the MySQL Application to the Environment
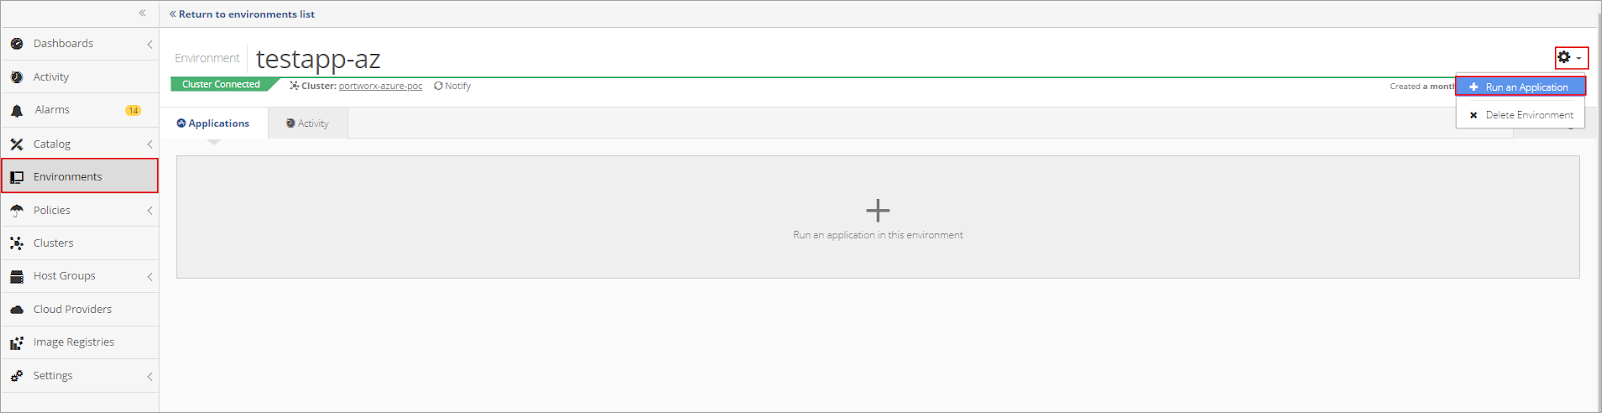
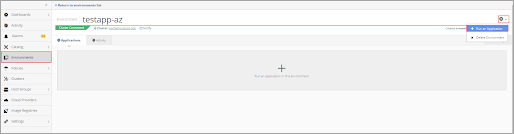
To run the MySQL Application in the Nirmata Environment, click on Environments in the sidebar menu.
Then open the newly created Environment. Click the gear in the top right corner of the Environments window and select the +Run an Application option.
Choose the MySQL Application and click +Run an Application.
Create a Wordpress Application
To create a new WordPress Application, utilize the WordPress YAML template. Adjust the template as needed. Remember to replace �password� with a secure keyref.
WordPress YAML Template:
apiVersion: v1
kind: Service
metadata:
 name: wordpress
 labels:
   app: wordpress
spec:
 ports:
   - port: 80
     nodePort: 30303
 selector:
   app: wordpress
   tier: frontend
 type: NodePort
---
apiVersion: extensions/v1beta1
kind: Deployment
metadata:
 name: wordpress
 labels:
   app: wordpress
spec:
 replicas: 3
 strategy:
   type: Recreate
 template:
   metadata:
     labels:
       app: wordpress
       tier: frontend
   spec:
     # Use the stork scheduler to enable more efficient placement of the pods
     schedulerName: stork
     containers:
     - image: wordpress:4.8-apache
       name: wordpress
       imagePullPolicy:
       env:
       - name: WORDPRESS_DB_HOST
         value: wordpress-mysql
       - name: WORDPRESS_DB_PASSWORD
         value: password
       ports:
       - containerPort: 80
         name: wordpress
       volumeMounts:
       - name: wordpress-persistent-storage
         mountPath: /var/www/html
     volumes:
     - name: wordpress-persistent-storage
       persistentVolumeClaim:
         claimName: wp-pv-claim
To add the WordPress YAML to the Application Catalog, click on Catalog in the sidebar menu and then select Application Catalog. From the main Application Catalog screen, click Add Application.
Drop the WordPress YAML file into the upload box or select the file from the directory.
Click Create. Once created, the WordPress application is listed in the Nirmata Application Catalog.
Add Persistent Volume Claims to the WordPress Application
Next, add the Persistent Volume Claims (PVC) to the WordPress Application.
Open the newly created WordPress Application in Nirmata by selecting Catalog from the sidebar menu and the Applications.
Click on the WordPress application in the Application List. Then open the Config & Storage dashboard.
Click + in the Persistent Volume Claims window to add a new PVC.
Deploy the WordPress Application
To run the WordPress Application in the Nirmata Environment, click on Environments in the sidebar menu.
Then open the newly created Environment. Click the gear in the top right corner of the Environments window and select the +Run an Application option.
Choose the WordPress Application and click +Run an Application.
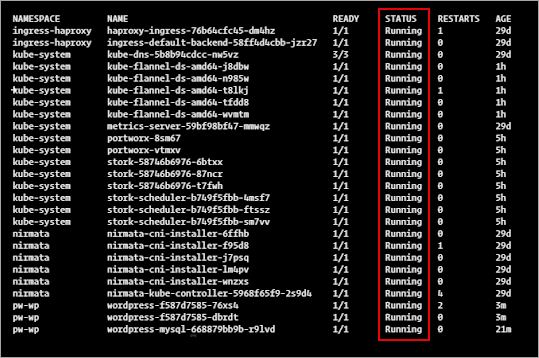
Verify the Application is Running in the Terminal and on the Nirmata Dashboard
To verify that the application is running in the terminal, open the Environment and select the the environment name, then the application name, and finally, the pod name.
From the Running Containers list, select the container name (mysql). Click the gear in the top right corner of the window and select the Launch Terminal option.
The displayed command is sh. Do not change the command. Select Connect Terminal.
In the terminal window, enter the Verify Status Commands in the Nirmata Terminal.
Verify Status Commands:
kubectl get pods
kubectl get services wordpress
To verify the application is running from the Nirmata dashboard, select Clusters from the sidebar menu.
The WordPress application and the MySQL application will display as green and Running.